Showing posts with label Gardening. Show all posts

Sunday, March 17, 2013

Is the Wooden Storm Window Done Yet?

Completed Storm Window left to dry.
The answer is YES, I finished last coat of paint while writing this.  I have many excuses why it took me so long to finish it. Here are some examples snow storms, planting seeds, house cleaning etc.  The last time I wrote about this project I finished priming the frame, ordered the new glass and planned on glazing the window panes over the weekend of February 24-25.  The glass panes were glazed in on the 25th.  First, I needed to throw out any glazing compound that showed signs it was drying out after that it needed to be knead.  The kneading allows it to soften and become pliable when working with it.   The first thing to do is put a thin layer of glazing on the lip where the glass pane will sit.  Then gently place the glass pane in the frame and press on the glass to obtain a good seal between the wood and glass. You will see some glazing squeeze out along the edge but do not press hard enough to squeeze all of it out. 

This type of glazing point is much easier to push but they also
have a setback.  Their edges are sometime hard to cover with
the glazing compound.
Don't use these they are awful to work with. 
The setup on the right show how I use a putty
knife to push it in. 


Once the window panes are firmly in place, it is time to press in the glazier's points.  I thought I still had some good points at home but all I have were these flat and large triangle points.  I decide to use them since I did not want to run out to the store, this was a mistake.  The triangle points are hard to push in and they need to pushed in a lot further compare to the other designs.  While trying to push in one of the points, my glazing knife slipped under my thumb nail.  Boy, there were a few #### when that happen.  I kept on working until all the points were inside the lip edge.

A completed glazing corner.
I learned a lot about glazing windows from "This Old House" and the book Working Windows by Terry Meany.  I need to re-glaze and weather-proof all my old window in this house.  Years ago when I owned another house I used an one-inch putty knife to do re-glaze all those window.  It was hard try to achieve a constant angle across the frame and it was almost impossible to get the angles to meet at the corners with the putty knife.  I found a glazing knife two years ago while working on the storm window to my back porch door.  The design make glazing so much easier one end of the knife is angled and the other side is flat.  The angled end makes it fairly easy to get a smooth straight angle across frame and the corners come out nice.  The flat side is good for removing the excess glazing compound.  You still will need to practice but it does not take long to archive a good result.  I rolled out long ropes of the compound and pressed them along the window frame and the glass.  After I pressed in the caulk I using the angle end of the knife to cut through the extra compound until there was a smooth angle of glazing compound between the frame and glass.  If there are a few minor flaws I used my fingers get a smooth edge.  Wear plastic gloves when doing this since the compound does not easily wash off your hands.  I cleaned up the area and put the window against the wall for the next week since the compound needs a week to setup.  It took me about 3 hours from start to finish before I had a nice looking window.  The longest time I spend was trying to get those triangle points in the frame.

Putty Knife top.  Glazing Knife is on the bottom.

A  week later I primed the caulk with an oil-based primer from what I read I needed to use an oil-based primer.  If using a water-base primer the glazing compound may fail sooner because the oil migrates out faster.  Last Wednesday was the first day I found time to start applying the exterior paint on the frame.  The hardest part painting a narrow bead of paint along the caulk edge and the glass.  Doing this forms a seal between the glass and glazing.  If you use a scraper on the bead to clean up, there is an chance that the seal been broken and the window will not weather very well.


Primed glazing: You can see how hard is it to keep a steady
hand along the glass and glazing edge.
Unfinished panel on the folding door.


My next unfinished project is shellacking the second panel to my closet door.  I finished half the door awhile ago but never found time to complete the job.  Don't ask how long ago it was; it is embarrassing to think I left it undone so long.

Wednesday, February 6, 2013

Winter Gardening

I spent this weekend working in the basement again.  I did some cleaning but most of the weekend I spent putting together a new plant stand.  I brought the stand in December when Jung had their Dollars Days.  I waited until the basement floor was done to assemble it and it was fairly easy to put together.  The wooden plant stand in the second bedroom just could not hold all the plants I start from seeds. 

Sunday, I planted two flats of petunias and put them on the heat mat.  I found time to start my 2013 Seed database.  This allowed me to determine which seeds I still need to order.  I will be ordering German Pink Tomatoes, Black Krim Tomatoes, Chocolate Beauty Pepper, Forkhood Acorn Squash, Table Queen Acorn Squash, Cheddar Cauliflower and Graffiti Cauliflower.  I will be trying these new varieties Black Plum Tomato and Lemon Mint Herb this year.

Monday, January 21, 2013

It's Done the Basement!

Finished Washer and Dryer Area
I put the final coat of paint on the basement floor today.  I restarted this project soon after Christmas.   I vacuumed and washed the area where the dryer and washing machine sits.  I turned on the dehumidifier to dry out the area and started painting floor on Saturday December 29 and finish it on New Year's Day.  I waited one week for the floor to cure before moving the machines back into place Monday evening January 7.

I had a lot of laundry to wash and dry since it had been a week and half the machine were out of commission.  I finally starting cleaning and washing floor the following Sunday and again turned on the dehumidifier and waiting until Friday January 18 to start painting on another four coats in the unfinished area.  

The last section to be painted.
Now I have another week for it to cure before I can move my freezer back along the wall that divides my sewing room and the unfinished basement.   Hopefully the weather will be below zero so I can defrosted and clean the freezer next Monday.  I move all the food from the freezer on the back porch while the freezer defrosts. 

My next project will be cleaning and sorting my stuff in the basement.  I would like to get it put back together by spring.  I also will be starting my plants from seed over the next few months starting this week.  Yesterday is only 16 weeks from Mother Day and it is time to start the geraniums for my planters.

A finished basement!!!

Thursday, November 29, 2012

A Little of This and a Little of That

In between posting I have been working on crossing things off my winter preparation list.  Examples are:
  • Changing out the wooden screen to storm windows
  • Cleaning out gutters after the white pine sheds all it pine needles.  Every year in the first half of October my White Pines have anywhere from a third of its needles turn yellow and fall off the tree and clog my gutters.  This year I filled five 5-gallon buckets of pine needles from the gutters.
  • Putting a tarp over the air conditioner unit.  I have central air and most people do not need to cover this unit but I do.  The reason I cover my unit  if I need to rake the snow off the roof this winter, the air conditioner unit is located near enough to the roof edge that snow falling of the roof into the unit could cause the fan blades to bend.  That could cause a problem on the motor and destroy it.  So I cover it to void any repair cost.
  • In an earlier posting “Living Room Curtains”, I show on set of curtains I finished putting a hem in.   I finished the second set in upholstery class except for hanging them and putting in the hem.   The unfinished curtains have been sitting in the dining since June and I finally found time to hem and hang them before Thanksgiving.   Having guests for the holiday always moves items up on the “TO DO LIST”.  Here is the finished project.

The living room new curtain completed.  Forgive the antenna hanging off the
curtain rod but this is the only way I can get good reception.
  • The garden been through several frosts since I pulled most of my garden in September but I did leave the all the Brussels sprouts, broccoli, 2 cauliflowers and 1 cabbage in the garden.  The weekend before Thanksgiving I harvested all those plants.  The cauliflower did not do well this year because of the drought so the heads were small.  There was enough broccoli left for two serving and an 8-inch head of red cabbage.  I have a second one in the refrigerator so my mother was the beneficiary of this cabbage.  I planted 6 Brussels sprouts plants.  The two Long Island Improved plants did poorly and one plant never formed heads.  I harvested the smaller leaved off that plants and sauté them with caramelized onion for Thanksgiving, MMM.  The Falstaff Brussels sprout did fair only forming small heads.  Jade Cross variety did the best these plants were the best producing variety I ever planted for Brussels sprouts.  I am not going to plant any Long Island variety next year.  I will still plant Falstaff because of the beautiful purple color and they taste good.  I spent the weekend after Thanksgiving blanching and freezing the sprouts.
  • Since the weather is turning cold and we had several raining weekends I did a through cleaning of the house.  Pulled up the rugs and moving furniture to wash the floor and dust and molding before Thanksgiving.  I needed to look good since Mom was coming for Thanksgiving.  The rest of the family was working over the holiday or going to theirs partner’s family event.
Revised end of  year “HOUSE TO DO LIST”
  • Cover up the 3 season porch windows with plastic inside and out.  Outside is done but this weekend I will be straightening up the porch and working on the windows.
  • Finished painting the basement floor with waterproof paint.  YES that DAMN basement still, excuse my language but I am sick of working on it.  Is this the 5th or 6th year I been working it?  Who knows!  Now that we are in the holiday season I will not be able to finish this until next year but I do plan on beginning work again in December.
Those two items are enough to work on until my new 2013 TO DO IT LIST comes out.

Sunday, September 23, 2012

September 23rd: Growing Season Ends but not the Gardening

All the tender crops were harvested on Saturday.  Notice the weeds in front,
this is how all the gravel paths looked when I returned from Alaska.
Yesterday I spent the whole day picking tomatoes, peppers, eggplant and tomatillo and basil and composting the plants.  I did manage to pick all the winter squash but left the vines to cleanup later.  I did notice I had some frost damage over Friday night but the frost was much heavier Sunday morning.  The harvest was OK considering that I was not home for 7 weeks during the worst drought in southern Wisconsin since the great depression. 

Someone asked a question on how my garden survived while I was in Alaska.  The answer is one of the neighbors down the street would stop and hook up one of my many soaker hose I setup before I went north.  My water bill for July was $107.00 and August was $160.00.  The city I live in did not put any watering restriction on during the drought.  I ask the clerk at the water department about it and her reply was if it had lasted much long they would have done it.  The local news stations did report that some nearby private wells did go dry this summer.
 
Another section that needs weeding.
The guy who did the watering kept apologizing for losing some plants and the overall shape of the garden.  I told him that I was grateful just to have a garden due to the drought.  The biggest crop to survive my absent was the weeds.  The weeds thrive extremely well in drought conditions.  I spent most of my time before leaving weeding my gravel paths, patio and driveway.  I wanted to spray herbicide on the driveway before I left but the wind never stopped blowing this May and June.  I try not to use sprays around my vegetables but sometimes it is the only way to control aggressive bugs or weeds.  I spent this last month cutting back the herb and perennial flower gardens.  I also weeded the gravel paths around all the gardens.  The gardens are well mulched and that did keep the weeds downs.  The exception is the perennial bed; I do not mulch that garden because I have bearded iris. The mulch allows the eggs from iris bores to winter over so the weeds took over the bed.  I still have half the patio, area in front of the shed and the driveway to weed.  So far I composted over 20 five-gallon buckets in the community compost since I been back.

 
The grape arbor by brother and I put up last spring. 
I put down mulch but it is not keeping the grass from invading it.
The vegetable harvest was good considering the summer.  I did get two pickings of green beans, enough tomatoes for eating and to make chili and stuffed peppers, some broccoli, eggplants, a small picking of tomatillos and two heads of purple cauliflower.  There are two crop that did extremely well this year the sweet and hot peppers and winter squash produced the largest crops I ever had.  The winter squashes include 3 Waltham butternuts, an abundance of Delicata and approximately a dozen Table Queen and Forkhook acorn squash.  The Brussels sprouts and red cabbages have been left in the garden because they become sweeten after a few frosting mornings.

Winter Squashes: The three Waltham butternut are in front behind them is Delicata. 
On the right side is the acorn squash; the green colored ones are Table Queen and
the cream ones are Forkhook.
I hope I answered some of your question about the garden.  I still hope to post more on the trip to Alaska when the duties around the house allow it.

Thursday, April 5, 2012

Spring Blooms


A daffodil blooming on 3/18/2012
Southwest Wisconsin spring has arrived 5 to 4 weeks early.  It is unheard of to have 80F weather in mid-March.  So many plants have come into bloom way to early.  The fruit tree are now blooming and for the next several nights a hard freeze is forecast.  Wisconsin Orchards may lose their fruit crops this year.  Here are some photos of plants in my yard.
  
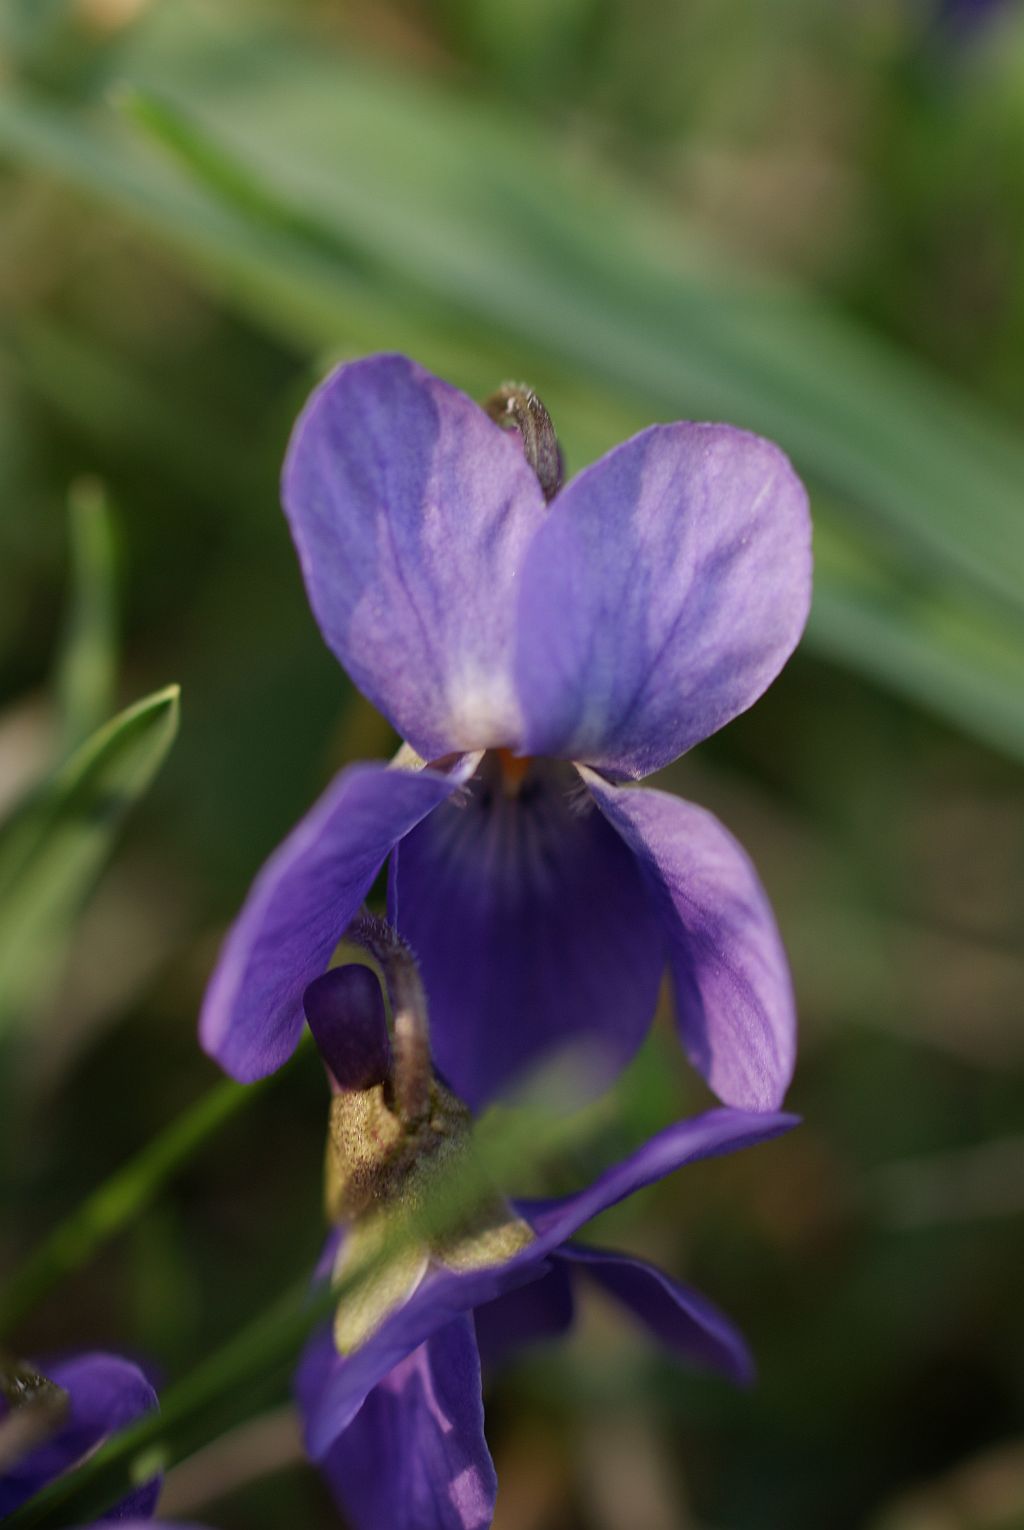
Violets blooming in the lawn on 3/21/2012
 
Hyacinth started opening on 3/18/2012
 
Tulip bloomed on 3/21/2012
 
Tulip bloomed on 3/25/2012
   

Crabapple Buds 4/3/2012

4/3/2012 Coral Bell Bud

Ground cover blooming 4/3/2012
Lilac buds 4/3/2012
      

Friday, March 16, 2012

2nd Weekend in March: Mother’s Day was only 9 weeks away.

Mother’s Day is my starting date for planting the tomatoes, peppers and eggplant outdoors.  So I pulled out my seed tray starter kit and started planting them.  I have 6 trays sitting on my heating mat set for 75oF.  I hope to see tomato seedling in the next 7 to 14 days.  The eggplant and pepper will sprout a little latter.

Here is my initial seed starter list for 2012.

Tomatoes
Brandywine: These heirloom pink tomatoes are large and taste great.
Black Krim: It is a little hard to tell when they are ripe.  The area around the stem may still be green and the lower section is a dark red (almost black).  This is my favorite for a bacon and lettuce sandwich.
Pink German: Pink Germans can weight up to 1 pound.  It does not take many of them to fill a quart canning jar.
Celebrity: A large perfect round red tomato.  This tomato is not an heirloom but it does produce well but not as flavor full as the three above. This tomato has been bred with resistance to many of the viruses that attack tomatoes.
Delicious: Another hybrid tomato which is a medium round size and colored red.
Green Zebra: When this tomato is ripe, its skin is yellow and green striped with green pulp inside.  I heard some say it taste like an apple but I do not think so.  To me still has the tomato taste but less acidic and not as rich as a red tomato.  It is nice to have different colored tomatoes to add visual appeal to a cold salad dish.
Gold Metal: A large yellow tomato with red streak in the pulp.  It is less acidic than the red and has good flavor.

Paste Tomatoes
Amish: After I told the guys at work that I started my tomatoes seed, one of them requested that I saved some Amish Paste for him.  He commented that they make a nice smooth thick tomato sauce.  All my paste tomatoes do not look like anything you can buy in the store.  Amish paste get about 4 inches long and about 2 inches wide.
Opalka: This is a new type for me and the description state 4-6 inch long with few seeds.
Federle: Another nice paste tomato about 4-6 inches long and 1-1½ inches wide

Cherry Tomatoes
Chocolate Cherry: This cherry tomato is large about ½ to ¾ in diameter.  The color when ripe is a dark reddish brown and has a nice mix of acidic and sweet flavoring.
Sungold: Pop this golden cherry tomato in your mouth and you will get a wonderful sweet rich flavor.  It is the taste of summer.

Tomatillo
Green Husk: Last year this plant grew to 7 feet high and it had the biggest tomatillo I ever seen.  The biggest were at least 2 inch across and produced tons of fruit.
Dr. Wyche's Yellow: When this tomatillo is ripe it is a little yellow color and tastes very sweet.  It only grows to about 5 feet in height.
Purple: Another 7 feet tall plant, the fruit has some purple coloring on the skin.  It grows to about an inch in size.

Sweet Bell Peppers: Orange Bell, Chocolate Bell, Purple Beauty, Early Sunsation Hybrid (Yellow), King Arthur (Fat’n Sassy, Red), King of the North (red).  All the peppers except Purple Beauty and Early Sunsation are green until they ripen into their color.  They can be eaten green or wait until they turn color.  The peppers are sweeter when fully mature.  The red is the sweetest with chocolate next.

Hot Peppers: Early Jalapeno and Ancho Girantea both are great.  I add roasted Ancho to green salsa made with tomatillo from my garden, and boy that was good!

Eggplants
Udumalapet: This egg shape fruit is a bright yellow and purple striped when ready for picking.  The fruit ranges from 2 to 4 inches in length.
Rosa Bianca: A nice round fruit and I picked it as big as 8 inches.  The prefer size for grilling is 4 inches.  I cut it into slices and brush on a little olive oil with some salt and pepper.  Melted provolone cheese on it and add fresh tomato, lettuce, onions and some vinaigrette on it and serve it on a toasted bun.  Mmm!


This coming weekend I will be sowing my cabbage, cauliflower, Brussels sprouts and broccoli.